How to Grow Arugula Indoors: A Step-by-Step Guide
Growing fresh greens indoors can be incredibly rewarding, and arugula is one of the easiest leafy greens to cultivate in your home! Let me share my own journey of growing arugula indoors — a journey that started with a craving for fresh, peppery leaves during a cold winter month.
I still remember that cold, snowy evening when I was longing for a fresh salad to brighten my day. I didn’t have anything in my fridge except a sad bag of wilted greens. It was then that I realized how wonderful it would be to have fresh, homegrown greens available anytime I wanted.
I decided then and there to take control over my fresh food supply and grow my own arugula — right on my windowsill. That decision was a game-changer! With just a little care, I soon had a thriving mini garden, and I’ve been enjoying fresh, peppery arugula salads ever since.
There is truly something special about watching your plants grow and enjoying the fruits of your labor, and arugula has become my favorite homegrown green.
Let me show you exactly how you can grow your very own arugula indoors so you can experience that same fresh delight!

Why Grow Arugula Indoors?
- Fresh and Flavorful: Arugula is known for its unique peppery taste that can elevate any salad or sandwich. Freshly picked arugula has an incredible taste that simply doesn’t compare to store-bought greens.
- Year-Round Harvest: By growing arugula indoors, you can have access to fresh greens even during winter. Imagine harvesting fresh arugula leaves during those cold months when everything outside is dormant!
- Easy and Quick: Arugula grows fast, making it perfect for beginners or those wanting a quick harvest. It is a low-maintenance plant that doesn’t need special care, making it a great choice for those new to gardening.
- Nutrient Dense: Arugula is packed with nutrients like vitamins A, K, and C. By growing it yourself, you ensure that the greens you consume are fresh and chemical-free, providing you with the maximum nutritional benefits.
What You’ll Need
- Container: A shallow pot or tray (at least 6 inches deep) with drainage holes. You can use any container as long as it has good drainage; even recycled containers work well.
- Soil: Well-draining potting mix. Arugula prefers soil that retains moisture but also allows excess water to drain away.
- Arugula Seeds: You can find these at any garden center or order them online. Look for organic seeds if you prefer chemical-free options.
- Spray Bottle: To keep the soil evenly moist. Misting is the best way to keep your arugula hydrated without disturbing the seeds.
- Sunlight or Grow Light: Arugula loves light, so pick a sunny windowsill or use a grow light. A grow light is particularly helpful if your indoor light is limited during the winter months.
Step-By-Step Instructions
- Prepare the Container:
- Fill your container with a well-draining potting mix, leaving about an inch of space at the top.
- Gently pat the soil down so it’s even but not compacted. Loose soil will make it easier for the arugula roots to grow.
- Make sure your container has enough drainage holes to prevent waterlogging, which could lead to root rot.
Sow the Seeds:
- Sprinkle arugula seeds across the surface of the soil, spacing them evenly. Arugula doesn’t mind growing close together, so don’t stress about exact distances.
- Cover the seeds lightly with a thin layer of soil. This layer should be about 1/8 inch thick; too deep and the seeds may struggle to sprout.
- Pat the soil gently to ensure good seed-to-soil contact, which will help improve germination rates.
Water the Seeds:
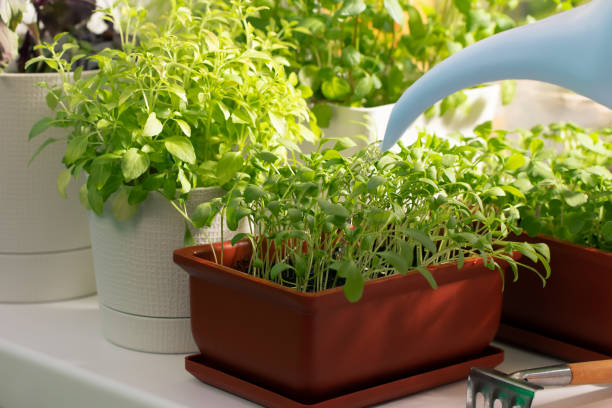
- Use a spray bottle to lightly mist the soil until it’s evenly moist. Arugula seeds need moisture to germinate, but avoid soaking the soil.
- It is important to keep the top layer of soil consistently moist until the seeds germinate, which usually takes 3-7 days.
Place in a Sunny Spot:
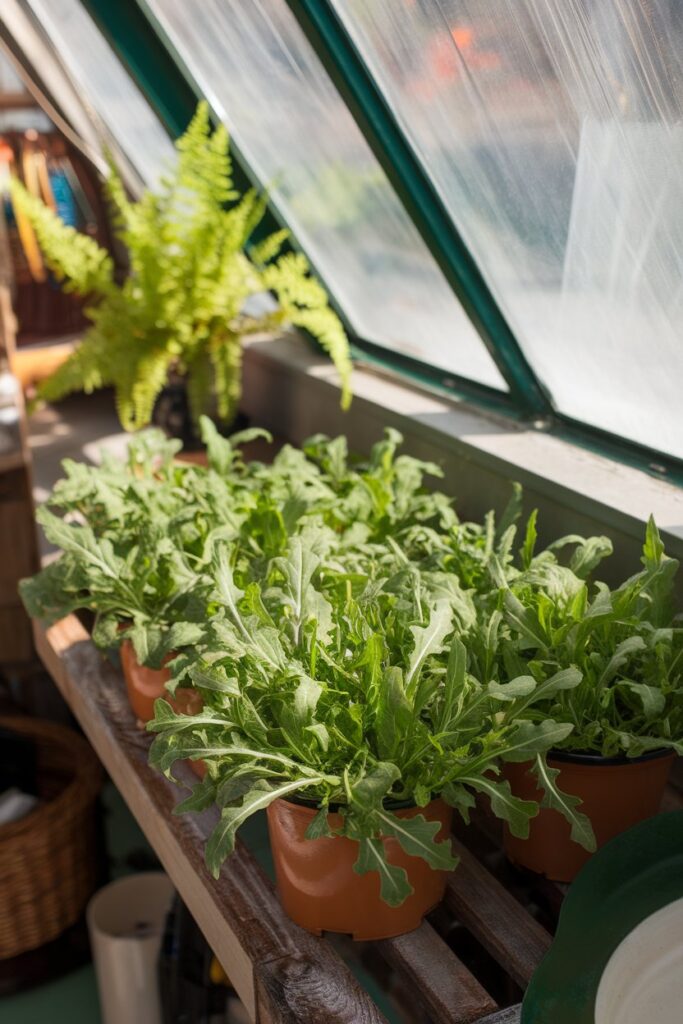
- Place the container on a sunny windowsill where it can get at least 6 hours of light a day. If natural light is limited, use a grow light set on a timer for about 12 hours a day.
- If you’re using a grow light, make sure it is placed about 6-12 inches above the container, adjusting as the plants grow.
Maintain Moisture:
- Keep the soil moist (but not waterlogged) by misting with water daily. As the arugula starts growing, you can reduce the frequency of misting, ensuring the soil stays moist but not soggy.
- Watering from the bottom can also help reduce the risk of mold; just place your container in a tray of water for a few minutes so the soil can absorb water through the drainage holes.
Harvest:
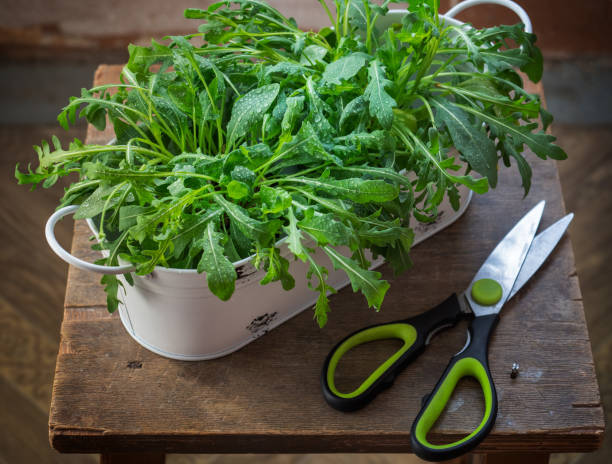
- In about 2-3 weeks, you can start harvesting baby arugula leaves. Simply snip off leaves as needed, and they’ll keep growing back!
- Harvesting the outer leaves first will allow the inner leaves to continue growing, giving you a longer harvesting period.
- If you let a few plants mature, they will produce flowers and eventually seeds, allowing you to save seeds for the next growing cycle.
Pro Tips for Growing Arugula Indoors
- Optimal Temperature: Arugula thrives in temperatures between 60-70°F (15-21°C). Keep it away from heaters that may dry it out, and avoid cold drafts from windows.
- Harvest Often: Regular harvesting encourages new growth, so don’t be afraid to enjoy it frequently! Arugula tends to become more bitter the older it gets, so frequent harvesting helps maintain a mild flavor.
- Rotate the Pot: If you’re using natural sunlight, rotate the container every few days to keep the plant from leaning towards the light source. This ensures even growth and prevents the arugula from becoming leggy.
- Fertilize Sparingly: If you notice the growth slowing down, you can add a light, water-soluble fertilizer once every two weeks. Just make sure not to over-fertilize, as arugula doesn’t require much feeding.
FAQs
1. Can I use garden soil to grow arugula indoors?
No, garden soil may contain pests or fungi. A well-draining potting mix is best for indoor growing. Garden soil may also be too dense, making it difficult for the roots to grow properly.
2. How long does it take to grow arugula indoors?
You can start harvesting baby arugula leaves in as little as 2-3 weeks. If you want more mature leaves, you can let the plants grow for about 4-6 weeks.
3. How much light does arugula need indoors?
At least 6 hours of sunlight a day, or 12 hours with a grow light. If your arugula starts getting leggy or pale, it may be a sign that it needs more light.
4. Can I regrow arugula after harvesting?
Yes! Arugula will continue to grow after you harvest its leaves. Cut the outer leaves first, leaving the central growing point intact, and new leaves will keep emerging.

Storage and Serving Suggestions
- Storage: Arugula is best used fresh, but you can store harvested leaves in a damp paper towel inside a plastic bag in the refrigerator for 3-4 days. The damp paper towel helps maintain the leaves’ crispness.
- Serving Ideas: Add fresh arugula to your salads, sandwiches, or even use as a pizza topping for that extra peppery flavor! You can also blend arugula into a pesto with garlic, olive oil, and nuts for a spicy twist on traditional pesto.
- Cooking Tip: Arugula is best used raw or added at the very end of cooking. Adding it too early can result in a wilted texture, so toss it in just before serving if using in warm dishes.
Nutritional Information Table
| Nutrient | Amount per Serving (1 cup) |
|---|---|
| Calories | 5 |
| Protein | 0.5g |
| Fiber | 0.3g |
| Vitamin K | 10% of Daily Value |
| Vitamin A | 3% of Daily Value |
| Vitamin C | 3% of Daily Value |
I hope this guide inspires you to start your very own arugula garden! Growing your own food is an empowering way to reconnect with nature, even in small indoor spaces. It doesn’t take much to grow arugula, but the rewards are truly priceless — fresh, flavorful greens and the joy of watching your garden thrive.
If you’re ready to enjoy the taste of fresh, homegrown greens, get your seeds and get started today. You’ll be amazed at how quickly you can turn a few seeds into a plentiful harvest!
Have you tried growing arugula indoors? I’d love to hear about your experience! Leave a comment below.


