How to Grow Parsnips: A Step-by-Step Guide
Parsnips are a sweet, nutty-flavored root vegetable that thrive in cooler weather and are perfect for soups, roasts, or purees.
Growing parsnips requires patience, as they take several months to mature, but the reward of fresh, homegrown parsnips is worth the effort.
Follow this detailed guide to grow parsnips successfully from planting to harvest.
Why Grow Parsnips?
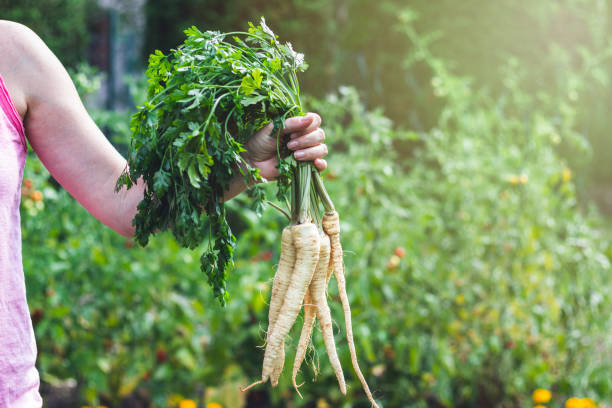
Parsnips are rich in fiber, vitamins, and minerals. They’re a great addition to a healthy diet and offer a unique, earthy sweetness that intensifies when cooked.
Unlike many other crops, parsnips improve in flavor after a frost, making them a perfect winter harvest vegetable. Parsnips are also relatively low-maintenance, making them a great choice for gardeners of all skill levels.
Their ability to store well for extended periods further enhances their appeal, allowing you to enjoy their flavor throughout the winter months.
Step 1: Prepare Your Soil
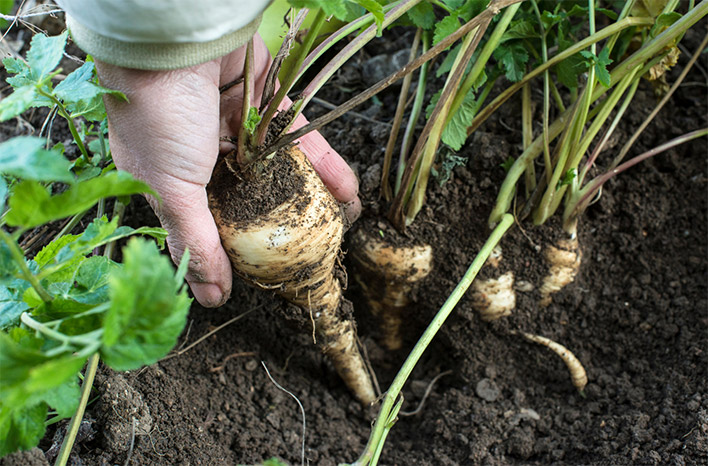
Parsnips need loose, well-draining soil to grow straight and deep. Here’s how to prepare your soil:
- Choose the Right Location: Select a sunny spot in your garden. Parsnips prefer full sun but can tolerate partial shade. Ensure the area is free of obstructions like tree roots or large rocks.
- Clear the Soil: Remove rocks, roots, and debris from the planting area. These can cause parsnips to fork or grow unevenly, leading to smaller or misshapen roots.
- Loosen the Soil: Dig or till the soil to a depth of at least 12-15 inches. Parsnips are long roots and need space to grow straight. For best results, use a broad fork to ensure the soil is deeply aerated.
- Amend the Soil: Mix in compost or well-rotted manure to improve soil fertility. Avoid using fresh manure, as it can lead to misshapen roots. Ensure the soil is light and crumbly to promote proper root formation.
- Test the pH: Parsnips grow best in slightly acidic to neutral soil with a pH of 6.0 to 7.5. Adjust with lime or sulfur if needed to achieve the ideal balance.
Step 2: Select Your Seeds
Parsnips are best grown from seeds, as they don’t transplant well. Popular varieties include:
- Hollow Crown: A classic variety known for its long, smooth roots and reliable growth.
- Gladiator: A disease-resistant variety with excellent flavor and a consistent shape.
- White Spear: A fast-growing option for earlier harvests, making it ideal for short growing seasons.
- Tender and True: Known for its smooth skin and sweet flavor, perfect for roasting or mashing.
Step 3: Plant the Seeds
- Timing: Parsnips are a cool-weather crop. Sow seeds in early spring, 2-4 weeks before the last frost, or in late summer for a winter harvest. For fall planting, ensure the crop matures before the ground freezes.
- Prepare the Rows: Make shallow furrows about 1/2 inch deep and space them 12-18 inches apart to allow for adequate root expansion and airflow.
- Sow the Seeds: Scatter seeds thinly along the rows or place them 2-3 inches apart. Parsnip seeds are small and should be handled carefully.
- Cover and Water: Lightly cover the seeds with soil and water gently to settle them. Avoid heavy watering that may displace the seeds.
- Label the Rows: Mark the planting area, as parsnip seeds can take 2-3 weeks to germinate. Adding a thin layer of fine sand on top can help retain moisture and highlight where seeds were planted.
Step 4: Thin the Seedlings
Once seedlings are 2-3 inches tall, thin them to 4-6 inches apart to give each plant room to grow. Use scissors to snip the weaker seedlings at the soil line to avoid disturbing the roots of the remaining plants.
This ensures proper spacing, which helps prevent competition for nutrients and reduces the risk of disease.
Step 5: Care for Your Parsnips
Watering
- Keep the soil consistently moist, especially during the early growth stages, to encourage healthy germination and root growth.
- Water deeply once a week to encourage deep root development. Shallow watering can result in stunted growth.
- Avoid overwatering, as waterlogged soil can cause the roots to rot or split.
Mulching
- Apply a 2-3 inch layer of mulch around the plants to retain moisture, regulate soil temperature, and prevent weeds. Mulching also helps protect the roots during sudden temperature changes.
Fertilizing
- If the soil was well-prepared, additional fertilizer may not be needed. However, in nutrient-poor soil, apply a low-nitrogen fertilizer mid-season to encourage root growth rather than leafy growth.
- Use organic options like bone meal or seaweed extract for a natural nutrient boost.
Pest and Disease Management
- Carrot Fly: Use row covers to protect plants from carrot fly larvae, which can damage the roots. Companion planting with onions or garlic can also deter pests.
- Canker: Prevent this fungal disease by maintaining consistent moisture levels and avoiding fresh manure. Rotate crops annually to reduce the risk of infection.
- Weeds: Regularly remove weeds that compete for nutrients and water. Mulching can also minimize weed growth.
Step 6: Monitor Growth
Parsnips take 100-120 days to mature. During this time:
- Check for signs of pests or disease and address issues promptly with organic solutions.
- Ensure consistent watering, especially during dry spells, to prevent stress on the plants.
- Monitor the growth of leaves, as healthy foliage indicates strong root development.
Step 7: Harvesting Parsnips
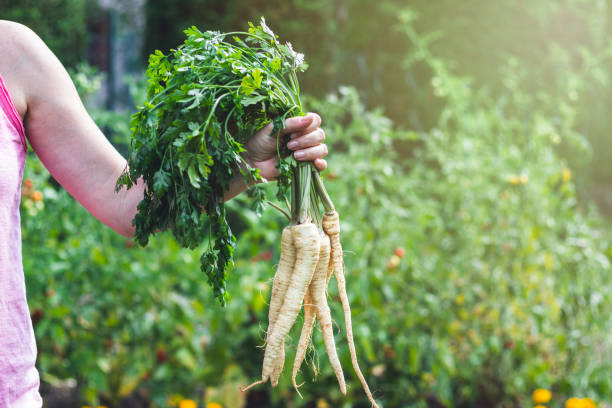
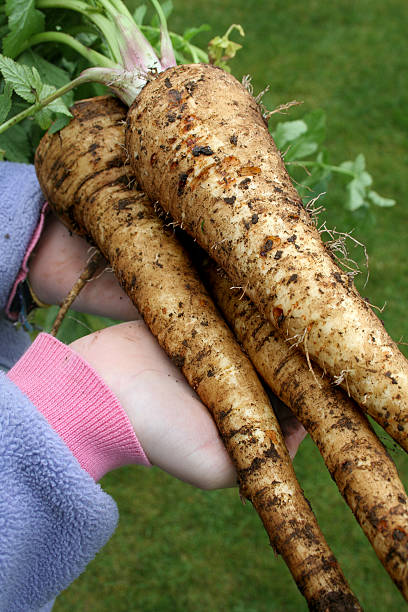
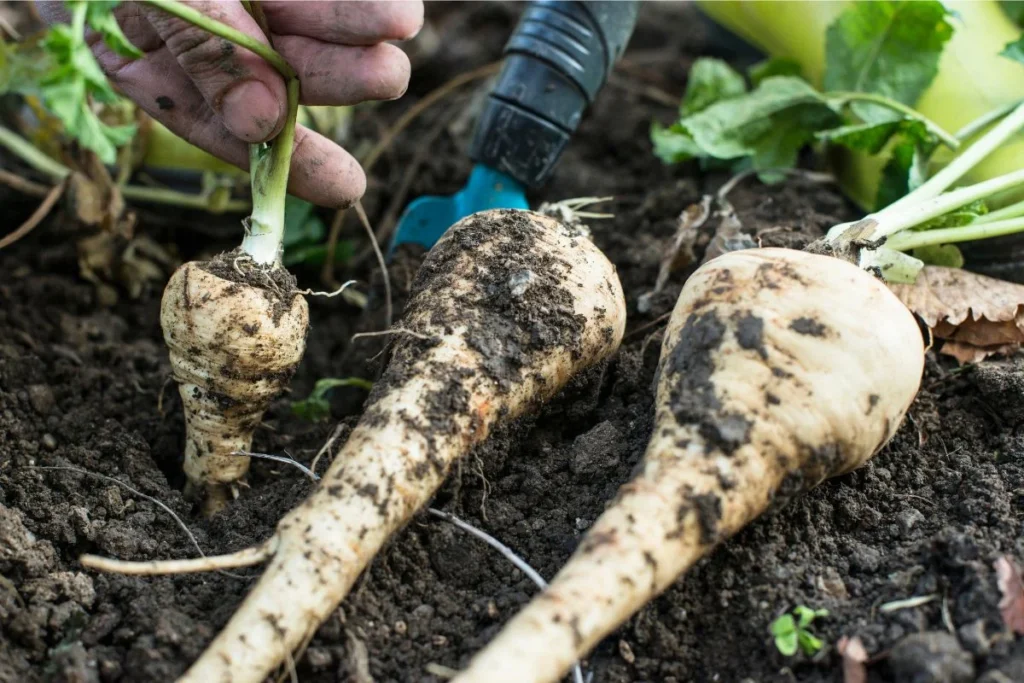
- Timing: Harvest parsnips after 3-4 months, when the roots are 1-2 inches in diameter. For the sweetest flavor, wait until after the first frost, as cold temperatures convert the starches into sugars.
- Loosen the Soil: Use a garden fork to loosen the soil around the roots carefully. This reduces the risk of breaking or damaging the parsnips during harvest.
- Pull the Roots: Gently pull the parsnips from the ground by their tops. Avoid yanking to prevent snapping the roots.
- Trim the Tops: Cut off the leafy tops if storing the roots for later use. The tops can draw moisture from the roots, reducing their shelf life.
Step 8: Storing Parsnips
- Short-Term Storage: Keep parsnips in the refrigerator for up to 2 weeks. Store them in perforated plastic bags to maintain humidity.
- Long-Term Storage: Store them in a root cellar or cool, dark place in damp sand or sawdust. This method keeps parsnips fresh for several months.
- Freezing: Blanch and freeze parsnips for longer storage. They can be used in soups and stews directly from the freezer.
Additional Tips
- Rotate Crops: Avoid planting parsnips in the same spot each year to prevent soil-borne diseases and nutrient depletion.
- Companion Planting: Grow parsnips alongside onions or garlic to repel pests and enhance overall garden health.
- Winter Harvesting: Leave some parsnips in the ground and cover them with mulch for harvesting throughout the winter. Their flavor continues to improve with prolonged exposure to cold.
- Experiment with Recipes: Try roasted parsnips with herbs, mashed parsnips, or adding them to soups for a creamy texture and rich flavor.
Growing parsnips takes time and patience, but the reward is worth it. With their rich flavor, long storage potential, and versatility in the kitchen, parsnips are a fantastic addition to any garden.
Follow these steps, and you’ll enjoy a bountiful harvest of this delicious root vegetable. Happy gardening!


