How to Grow Potatoes: A Step-by-Step Guide
Potatoes are one of the most rewarding crops to grow at home. They are versatile in the kitchen, easy to cultivate, and produce a bountiful harvest.
Whether you’re growing them in a garden, raised bed, or container, this guide will walk you through every step of the process, from selecting seed potatoes to storing your harvest for months of enjoyment.
Why Grow Potatoes?
Potatoes are a staple food in many diets, rich in carbohydrates, vitamins, and minerals. Homegrown potatoes have unmatched freshness and flavor compared to store-bought ones.
Plus, they’re relatively easy to grow, making them perfect for both novice and experienced gardeners. Growing your own potatoes is also cost-effective, as a small investment in seed potatoes can yield a large harvest.
Potatoes are highly adaptable and can be grown in various climates, making them a must-have crop in any garden.
Step 1: Choose Your Potato Variety
Different potato varieties have unique flavors, textures, and uses. Here are some common types to consider:
- Russet Potatoes: Ideal for baking and frying due to their fluffy texture.
- Yukon Gold: Great for roasting, mashing, and boiling, with a creamy texture and buttery flavor.
- Red Potatoes: Perfect for salads, boiling, and steaming, as they hold their shape well.
- Fingerling Potatoes: Known for their buttery flavor, unique elongated shape, and suitability for roasting.
- Purple Potatoes: Eye-catching with their vibrant color and full of antioxidants, ideal for roasting and steaming.
When choosing a variety, consider your cooking preferences and storage needs. For instance, Russets are excellent for long-term storage, while new potatoes like Red Bliss are best enjoyed fresh.
Step 2: Select and Prepare Seed Potatoes
Potatoes are grown from “seed potatoes,” which are certified disease-free tubers. Here’s how to prepare them:
- Purchase Seed Potatoes: Buy from a trusted garden center or supplier to ensure they are disease-free and high quality.
- Cut Larger Potatoes: If the seed potatoes are large, cut them into smaller pieces, ensuring each piece has at least one “eye” or sprout. Let the cut pieces dry for 1-2 days to form a protective layer and prevent rotting.
- Pre-Sprout (Optional): Place seed potatoes in a cool, bright spot to encourage sprouting before planting. This is particularly useful in areas with short growing seasons.
Step 3: Prepare the Planting Site
Soil Requirements
- Potatoes prefer loose, well-draining soil rich in organic matter to encourage healthy root and tuber development.
- The soil pH should be slightly acidic, between 5.0 and 6.5, to prevent diseases like scab.
Location
- Choose a sunny spot with at least 6-8 hours of direct sunlight daily. Potatoes thrive in full sun, which promotes vigorous growth and tuber production.
Soil Preparation
- Loosen the soil to a depth of 12 inches to allow roots to grow freely and tubers to expand.
- Mix in compost or well-rotted manure to improve fertility and soil structure.
- Remove weeds and debris to create a clean planting area, as competition can stunt potato growth.
Step 4: Plant the Potatoes
- Timing: Plant potatoes in early spring, 2-4 weeks before the last frost date, when the soil temperature is at least 45°F (7°C).
- Create Trenches: Dig trenches about 6-8 inches deep and space them 12-18 inches apart. These trenches will help retain moisture and make hilling easier later.
- Place Seed Potatoes: Lay the seed potatoes in the trench with the “eyes” facing up. Space them 10-12 inches apart to ensure they have enough room to grow.
- Cover with Soil: Lightly cover the potatoes with 3-4 inches of soil. Avoid filling the trench completely at this stage; you’ll add more soil as the plants grow.
Step 5: Care for Growing Potatoes
Watering
- Keep the soil consistently moist but not waterlogged to prevent tubers from cracking or rotting.
- Potatoes need about 1-2 inches of water per week. During dry spells, increase watering to keep the soil evenly damp.
- Avoid overhead watering to minimize the risk of fungal diseases.
Hilling
- When the plants reach 6-8 inches in height, mound soil around the base of the plants to cover the lower stems and developing tubers. This process, called “hilling,” prevents the tubers from being exposed to sunlight, which can turn them green and toxic.
- Repeat hilling every 2-3 weeks, adding soil until the hill is about 12 inches high. Hilling also helps support the plants and improves drainage.
Fertilizing
- Use a balanced, low-nitrogen fertilizer to promote tuber development. Too much nitrogen encourages leafy growth at the expense of tubers.
- Apply fertilizer once at planting and again mid-season to boost yields.
Pest and Disease Management
- Colorado Potato Beetles: Handpick beetles and larvae, or use organic pesticides like neem oil.
- Blight: Choose disease-resistant varieties, practice crop rotation, and avoid overhead watering to reduce the risk of this fungal disease.
- Wireworms: Rotate crops and avoid planting potatoes in the same spot each year to minimize pest populations.
Step 6: Harvesting Potatoes
New Potatoes
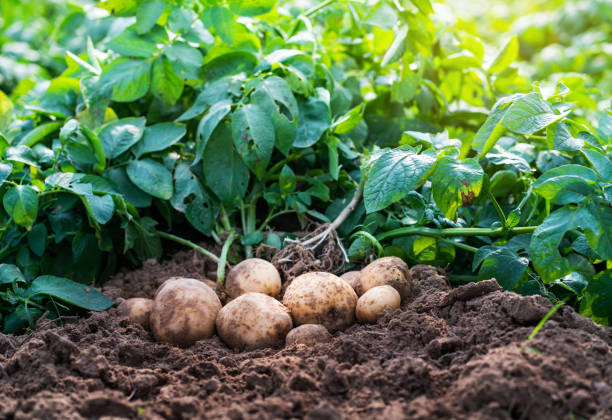
- Harvest young “new potatoes” 2-3 weeks after the plants flower. These small, tender tubers are perfect for steaming or boiling.
- Gently dig around the base of the plant with your hands or a trowel to remove the new potatoes without disturbing the main crop.
Mature Potatoes
- Wait until the foliage turns yellow and dies back, usually 10-12 weeks after planting, before harvesting mature potatoes.
- Use a garden fork to carefully lift the plants, starting from the edges to avoid damaging the tubers.
- Let the potatoes cure in a cool, dark, and dry place for 1-2 weeks. This process toughens their skin and improves their storage life.
Step 7: Storing Potatoes
- Short-Term Storage: Keep fresh potatoes in a cool, dark, and well-ventilated space. Avoid storing them in the refrigerator, as cold temperatures can turn the starch into sugar, affecting flavor.
- Long-Term Storage: Store cured potatoes in a root cellar or similar location at 40-50°F (4-10°C) with high humidity to prevent them from drying out.
- Check Regularly: Inspect stored potatoes for signs of rot, sprouting, or shriveling. Remove affected tubers to prevent spoilage.
Additional Tips for Success
- Rotate Crops: Avoid planting potatoes in the same spot each year to reduce the risk of pests and diseases.
- Companion Planting: Grow potatoes alongside beans, corn, or marigolds to deter pests and enhance soil health.
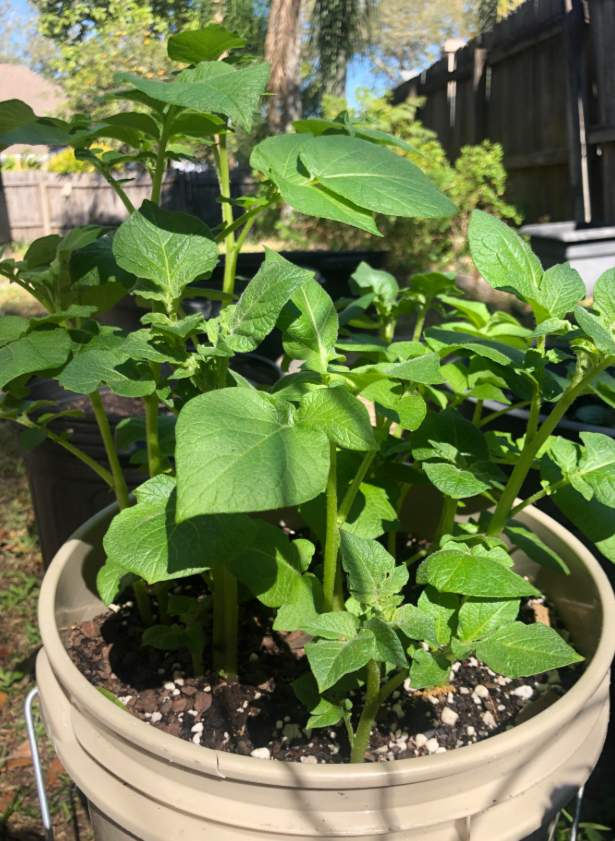
- Container Gardening: If space is limited, grow potatoes in large containers or grow bags. Ensure proper drainage and follow the same planting and care guidelines.
- Extend the Season: Use mulch or row covers to protect plants from late frosts and extend the growing season.
- Experiment with Varieties: Grow multiple types of potatoes to enjoy different flavors, colors, and textures.
Growing potatoes at home is a fun and rewarding experience.
By following these detailed steps, you’ll enjoy a delicious harvest of fresh, flavorful potatoes that are perfect for any dish. Happy gardening!
