How to Grow Microgreens Indoors: A Simple Guide to Fresh Greens Year-Round
Growing microgreens indoors gives beginners a practical way to produce fresh, flavorful greens in a small space during any season.
With a shallow tray, suitable seeds, growing medium, light, and consistent moisture, a home grower can raise a crop in about one to three weeks.
This guide explains each step, from choosing varieties and preparing the tray to harvesting and storing the finished greens.
Choose Fast-Growing Microgreen Varieties for Indoor Cultivation

Choosing quick-growing varieties helps indoor growers enjoy a harvest within about one to two weeks.
Radish, broccoli, mustard, pea shoots, and sunflower microgreens are reliable choices for beginners because they germinate readily and produce vigorous growth. Radish and mustard add a peppery flavor, while peas and sunflower offer sweeter, heartier shoots.
For the most consistent results, each tray should contain seeds with similar growth rates.
Large seeds such as peas and sunflower may benefit from soaking before sowing, while small seeds such as broccoli and radish usually can be planted dry. Selecting seeds sold specifically for microgreen production also helps ensure good germination and safe use.

Gather Trays, Seeds, Growing Medium, and Lighting

Before planting, an indoor grower should collect shallow trays, quality microgreen seeds, a light growing medium, a spray bottle, and a dependable light source.
Trays with drainage holes work well when paired with a solid catch tray. A humidity dome can help retain moisture during germination, although it is optional.
A seed-starting mix, coco coir, or a purpose-made microgreen mat provides a suitable root zone.
Natural light from a bright window may work for a small crop, but a full-spectrum LED grow light offers more consistent results. The light should cover the entire tray and be placed according to the manufacturer’s recommended distance.
Prepare a Clean Tray With the Right Growing Medium

Clean preparation reduces the chance of mold and uneven growth. The tray should be washed with warm, soapy water, rinsed thoroughly, and allowed to dry before use.
If a tray has been used previously, sanitizing it with a suitable diluted disinfectant and rinsing well can provide additional protection.
The growing medium should be light, moisture-retentive, and free of large pieces.
A seed-starting mix, coco coir, or microgreen mat is suitable. Fill the tray with roughly one to two inches of medium, then level the surface without compacting it. Moisten the medium before sowing so the seeds remain in place instead of floating or washing into corners.
Sow Microgreen Seeds Evenly Across the Tray

Once the medium is evenly moist, seeds can be scattered across the surface. The goal is a dense but reasonably uniform layer, with little bare soil and minimal clumping.
Small seeds such as broccoli, radish, and mustard can be sown more thickly. Larger seeds, including peas and sunflower, need more space and should be distributed in a single layer.
The seeds may be pressed gently into the medium or covered with only a very thin dusting of mix.
A fine spray of water helps settle them without displacing them. If several varieties share one tray, separate them into clearly marked sections and choose varieties with similar harvest times.
Use a Short Blackout Period to Encourage Strong Seedlings

After sowing and watering, the grower can place a second tray upside down over the planted tray to create a short blackout period.
A light, even weight on top encourages seeds to make firm contact with the growing medium while keeping the surface consistently dark and humid. The cover should not crush the emerging seedlings or trap excessive heat.
Most varieties need about two to four days in darkness, although timing varies by seed type and room conditions.
The grower should check for a dense carpet of upright sprouts rather than relying only on the calendar. Once seedlings lift the cover or appear ready to reach for light, the blackout tray should be removed and the microgreens moved under suitable lighting.
Position Seedlings Under Adequate Indoor Light

When the blackout period ends, the grower should move the trays beneath a bright, evenly distributed indoor light.
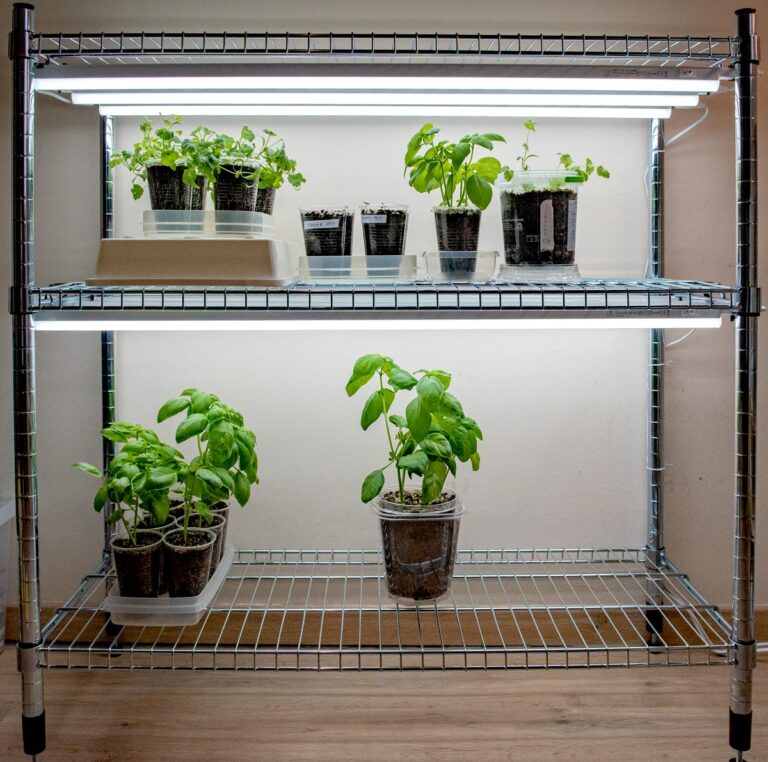
Full-spectrum LED shop lights or grow lights work well because they spread illumination across the entire tray and use less energy than many older bulbs. The fixture should sit close enough to prevent thin, stretched stems but high enough to avoid excessive heat on the leaves.
A timer helps maintain a dependable daily schedule, often providing roughly 12 to 16 hours of light followed by darkness.
The grower should watch the seedlings: leaning plants usually need stronger or closer light, while pale or scorched leaves can indicate poor positioning. Rotating trays is useful when the fixture does not illuminate every edge evenly.
Water Microgreens Carefully to Prevent Mold and Root Problems

The grower should keep the growing medium evenly moist without leaving it saturated. During germination, a fine mist can dampen the surface without dislodging seeds.
After roots develop, bottom watering is often gentler: water is added to a lower tray, allowing the growing medium to absorb moisture through drainage holes. Any water left after soaking should be emptied rather than allowing trays to stand in stagnant water.
Overwatering creates airless conditions that encourage mold, weak roots, and damping-off problems.
Underwatering can cause wilting and uneven growth. The grower should check tray weight and surface moisture before watering again, using clean water and sanitized equipment. Dense planting, poor drainage, and wet foliage should be corrected promptly.
Improve Airflow and Maintain a Stable Growing Environment

Good airflow helps the grower keep leaves dry, reduce stagnant humidity, and discourage mold. A small circulation fan can provide a gentle breeze across the trays without blasting delicate seedlings.
The fan should move air around the growing area rather than point forcefully at one tray. If several shelves are used, airflow should reach each level and not be blocked by crowded containers.
A stable environment also depends on steady room temperature, moderate humidity, and clean trays. The grower should avoid placing microgreens beside heating vents, cold drafts, or direct sunlight that can cause sudden temperature swings.
Covers and humidity domes should be ventilated or removed once seedlings emerge. Regular observation makes it easier to adjust fan speed, spacing, and watering before problems spread.
Recognize When Indoor Microgreens Are Ready to Harvest

Microgreens are usually ready when their stems stand upright, the cotyledons are fully open, and the first true leaves are beginning to appear. Many indoor crops reach this stage about 7 to 21 days after sowing, although radish, broccoli, kale, pea, and sunflower varieties follow different timelines.
The most reliable guide is plant appearance rather than the calendar.
A grower can check the tray each day for strong color, firm stems, and a dense canopy. Harvesting before the true leaves become large usually produces tender greens with concentrated flavor.
If seedlings are yellow immediately after blackout, they may simply need exposure to light; persistent yellowing, wilting, or foul odors indicate a growing problem instead of harvest readiness.
Cut, Clean, and Store Freshly Harvested Microgreens

Harvesting works best when the greens are dry. A grower should sanitize sharp scissors, gather a small section of stems, and cut just above the growing medium.
This keeps most soil or mat fibers out of the harvest and limits crushing. The cut greens can be inspected immediately, with damaged leaves, seed hulls, and bits of growing media removed.
Washing is optional when the crop was grown cleanly, but rinsed greens must be dried thoroughly before storage. A rigid food-safe container lined with a dry paper towel helps absorb condensation.
The container should go into the refrigerator promptly, and the towel should be replaced if it becomes damp.
Solve Common Indoor Microgreen Problems

Most indoor microgreen problems can be identified by visible symptoms. Long, weak stems usually point to insufficient or poorly positioned light, while pale seedlings may need time under a grow light after blackout.
Wilting often results from inconsistent moisture, heat, or damaged roots. Patchy germination can come from uneven seed distribution, old seed, or inconsistent contact with the growing medium.
Fuzzy growth should be checked closely. Fine white root hairs may be normal, but spreading surface growth, slime, unpleasant odors, or collapsing stems can indicate mold or damping-off. Affected trays should be isolated and discarded when food safety is uncertain.
For the next batch, the grower can reduce crowding, improve airflow, clean equipment, and change one growing condition at a time so the cause becomes easier to identify.
Create a Repeatable Year-Round Growing Schedule

A repeatable schedule begins with the household’s weekly demand. Instead of sowing every tray at once, the grower can start one tray every 5 to 10 days.
This succession approach places trays at different stages—newly seeded, germinating, growing under light, and ready to harvest—so fresh greens arrive continuously rather than all at once.
A simple record should list the crop, seed date, expected harvest window, actual harvest date, and notes about flavor or problems. After harvesting, the tray can be emptied, cleaned, and reseeded on the same rotation day.
Fast crops such as radish and broccoli can anchor the schedule, while slower pea, sunflower, or herb crops can be added according to household needs. Indoor lighting makes the cycle usable in every season.
Once the basic process becomes familiar, growing microgreens indoors can become a simple, dependable part of a home routine.
Consistent moisture, strong light, good airflow, and timely harvesting help each crop produce crisp, nutritious greens. By starting new trays at regular intervals, a home grower can maintain a steady supply throughout the year.