How to Grow Baby Kale Indoors for Fresh Greens All Year Round
Learning to grow baby kale indoors gives home gardeners a dependable supply of tender, nutritious greens in every season.
With a sunny window or grow light, shallow containers, and a simple succession-sowing routine, kale can produce fresh leaves even when outdoor conditions are unsuitable.
Choose Baby Kale Varieties That Perform Well Indoors

For indoor growing, compact and quick-growing kale varieties are usually the easiest choices.
Red Russian, Dwarf Siberian, Vates, and Baby Curled can produce tender leaves without demanding the space required by full-size plants.
Loose-leaf types are especially useful because the outer leaves can be harvested gradually while the center continues growing.
Leaf shape and color also help create variety in a small indoor garden. Curly kale adds texture, while Tuscan or lacinato types provide long, dark green leaves.
The seed packet should identify the variety as suitable for baby-leaf harvesting, containers, or quick maturity. Choosing two or three types allows the grower to compare flavor, growth rate, and performance under the same indoor conditions.
Gather Containers, Growing Medium, Seeds, and Lighting

Before planting, the grower should assemble every essential supply in one place.
The basic setup includes kale seeds, a clean container or seed-starting tray, a fine-textured growing medium, a watering can or spray bottle, and a shallow saucer to catch excess water. Plant labels are useful when several varieties are started together.
Lighting is equally important indoors. A bright south-facing window may support baby kale, but a full-spectrum LED grow light provides more consistent results when daylight is weak or seasonal.
The light should be positioned close enough to keep seedlings compact without touching the leaves. Having the containers, medium, seeds, and light ready before sowing helps prevent delays after germination.
Select Containers With Enough Depth and Drainage

Baby kale can be harvested young, but its roots still need a stable, well-drained space.
A container about 8 to 12 inches deep works well for continued leaf production, while a shallow tray is suitable only for a quick baby-leaf crop. Rectangular planters make efficient use of shelf space, and individual pots allow different varieties to be managed separately.
Every container should have drainage holes in the bottom. Without them, water can collect around the roots and create weak growth or root problems.
The grower should place each pot on a saucer or waterproof tray, then confirm that water can escape freely after watering. Clean nursery pots, fabric pots, and food containers with added drainage holes can all work when sized appropriately.
Prepare a Loose, Moisture-Retentive Growing Medium

A suitable growing medium gives baby kale roots both moisture and oxygen. The mix should be light, fine-textured, and free of large bark pieces that can interfere with small seeds.
A quality seed-starting mix or vegetable potting mix is a practical base. Coconut coir or peat helps retain moisture, while perlite improves airflow and drainage.
Before filling the containers, the grower should moisten the mix evenly so it feels damp but not saturated. A simple blend can combine two parts coir with two parts fine compost and one part perlite or vermiculite.
The medium should be loosely placed in the container rather than tightly compressed. This keeps the surface open for germination while reducing the risk of dry pockets and waterlogged roots.
Sow Baby Kale Seeds at the Proper Depth and Spacing

The grower should fill a clean seed tray or shallow container with a fine, well-draining seed-starting mix and moisten it before sowing. Baby kale seeds generally perform well when planted about 1/4 to 1/2 inch deep.
A shallow hole made with a pencil tip keeps the depth consistent without burying the seed too deeply.
For baby-leaf harvests, seeds can be spaced about 1/2 to 1 inch apart in rows or scattered thinly across a tray.
Crowding is acceptable for young greens, but dense patches should still have enough room for air movement. After sowing, the grower should cover the seeds lightly, label the variety, and water gently so the seeds remain in place.
Provide Strong Light for Compact, Healthy Growth

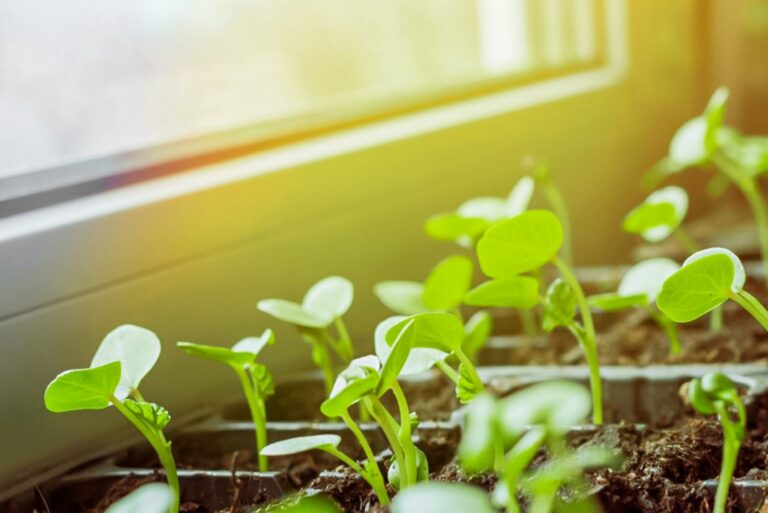
Once baby kale seedlings emerge, the grower should place the tray under a bright full-spectrum grow light or in the strongest available window. Indoor light coming from one side often produces stretched stems, so an overhead fixture is usually more effective.
The light should remain close enough to illuminate the leaves evenly without creating excessive heat.
A consistent daily schedule helps baby kale develop short stems and sturdy leaves.
The grower should check the tray every few days and raise the fixture as the plants grow, keeping the canopy evenly lit. Rotating a windowsill tray can reduce leaning, while a reflective surface behind the plants can help redirect light toward shaded sides.
Maintain the Right Temperature and Air Circulation

Baby kale grows best in the cooler conditions associated with leafy brassicas. The grower should keep the indoor growing area away from hot radiators, heating vents, and strong temperature swings.
A moderate room temperature during the day and a slightly cooler night period can help prevent weak, overly stretched growth.
Gentle air movement is equally important. A small fan set on low can circulate air around the tray without blasting the seedlings or drying the mix too quickly.
The goal is a slight leaf movement rather than bent stems. Good circulation also helps reduce stagnant humidity around the foliage and keeps the growing surface from staying wet for too long.
Water Indoor Kale Without Causing Root Problems

The grower should keep the seed-starting mix evenly moist but never saturated. Before watering, the surface can be checked with a fingertip, and the tray can be lifted to judge whether it feels noticeably lighter.
When the mix begins to dry, water slowly until a small amount drains from the bottom holes.
Bottom watering is especially useful for young kale because it moistens the root zone without washing seeds away or splashing soil onto delicate stems.
The tray can sit in a shallow pan of water for several minutes, then should be removed and allowed to drain completely. Standing water beneath the container deprives roots of air and increases the risk of root rot.
Thin Seedlings to Encourage Fuller Baby Greens

Once the young kale plants develop their first true leaves, crowded seedlings should be thinned.
Keeping every sprout may seem productive, but tightly packed plants compete for light, water, nutrients, and root space. The strongest seedlings should remain, while weaker or unusually stretched sprouts can be removed.
Small scissors provide the safest method in a container because cutting unwanted stems at soil level avoids disturbing nearby roots.
For baby kale, the remaining plants can stay closer together than mature kale, but each should still have enough room for leaves to expand and air to move around the foliage. Thinning also makes watering and harvesting easier.
Feed the Plants Lightly During Continued Growth

Baby kale growing in a small container may eventually use the available nutrients, especially after repeated harvests.
Feeding should begin only after the plants are established and producing true leaves. A balanced liquid fertilizer diluted to half the label strength is usually sufficient for continued leafy growth.
The fertilizer solution should be applied to already moist potting mix rather than dry roots. A gentle soil drench keeps nutrients near the root zone and reduces the chance of leaf spotting.
Feeding every few weeks is generally safer than adding fertilizer at every watering. If the leaves look healthy and growth remains steady, plain water may be all the plants need.
Harvest Baby Kale for Repeated Indoor Production

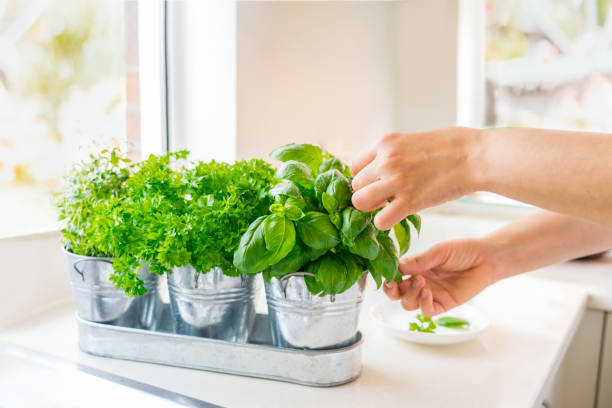
Baby kale can be harvested as soon as the leaves are tender and large enough to use, often several weeks after sowing. Instead of removing the whole plant, the grower should cut or pinch the largest outer leaves first. Clean scissors make a neat cut near the base of each leaf and reduce unnecessary damage.
The central growing point and youngest leaves should remain untouched so the plant can continue producing.
Harvesting only what is needed also keeps the container productive for longer. Leaves should be harvested when they look fresh and firm, then rinsed and used promptly for salads, sandwiches, smoothies, or cooked dishes.
Use Succession Sowing to Grow Fresh Kale All Year

Succession sowing keeps indoor kale production moving instead of relying on one planting.
A new small batch of seeds can be started every two to three weeks, depending on available space and how quickly the household uses the leaves. As one tray reaches harvest size, a younger tray is already developing nearby.
Several small containers are easier to manage than one overcrowded planting. Each group can occupy a different stage: newly sown seeds, established seedlings, harvest-ready baby kale, or plants nearing replacement.
Labeling each sowing date helps the grower rotate trays, maintain steady harvests, and avoid having every container mature at the same time.
When the plants receive adequate light, consistent moisture, good drainage, and regular harvesting, indoor baby kale remains a practical source of fresh greens throughout the year.
A steady succession of small plantings allows the home gardener to replace harvested crops before the next batch is ready.